Telegram
Step 1. register in the system.
To register, simply find @DashbotProBot bot in Telegram, or follow the link https://t.me/DashbotProBot?start=go. You can also register from the home page at

After starting the bot, the user is automatically registered in the service and a link is generated for him, when you follow the link the user enters immediately into a personal account.

Step 2: Create a template.
You can get started either by creating a bot or by creating templates. For example, let's start with templates.
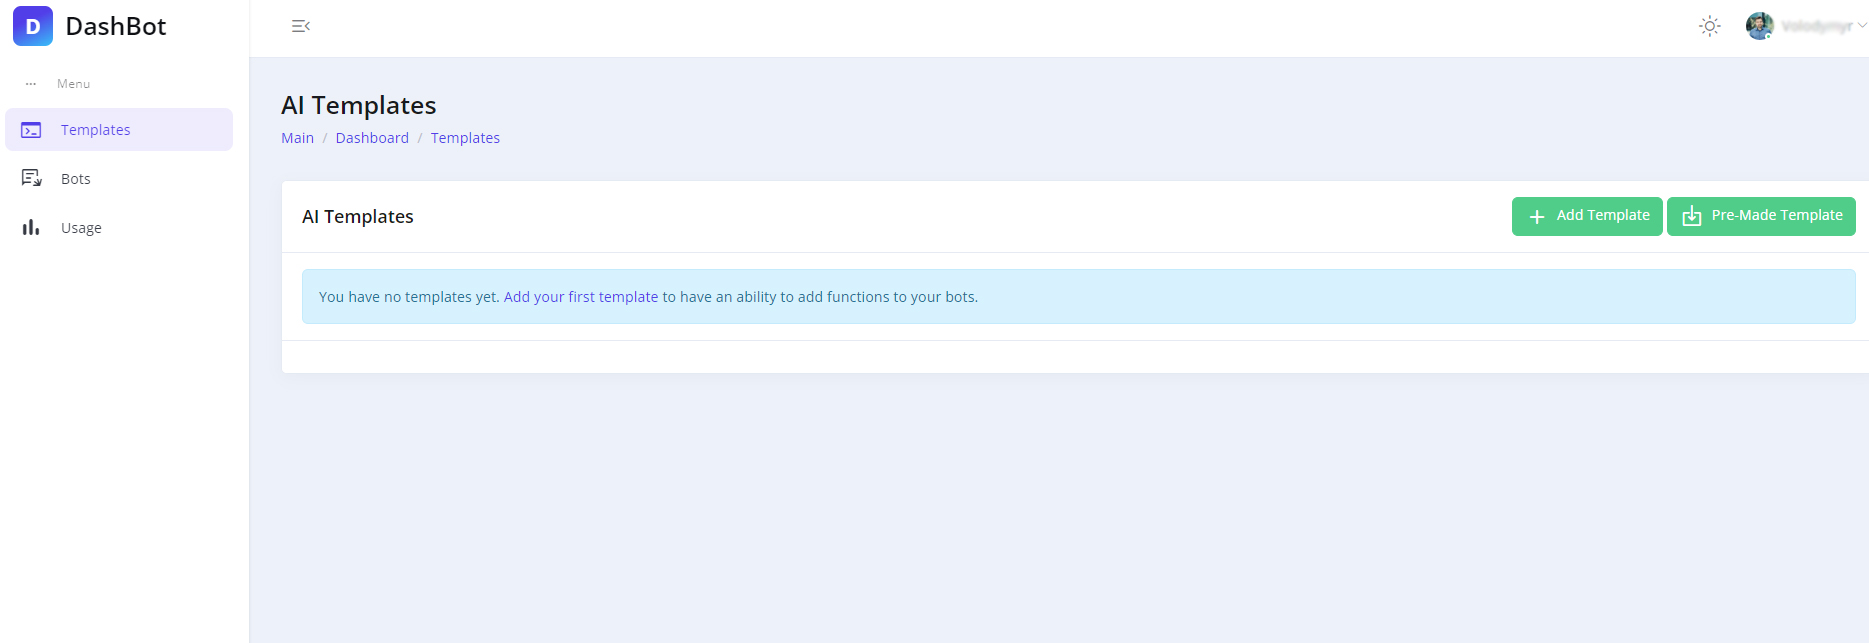
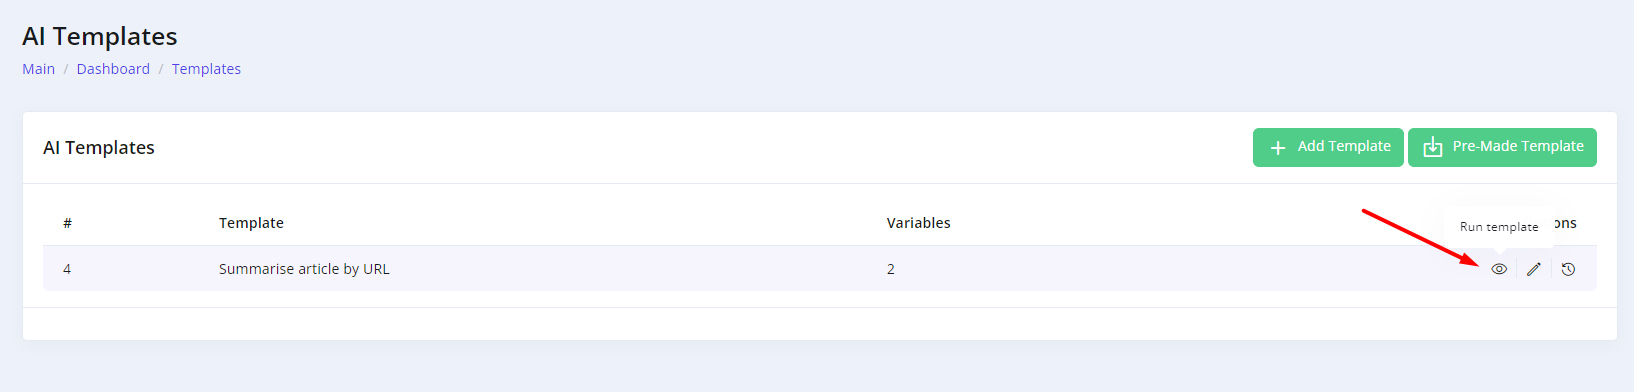
Let's create the first AI template.
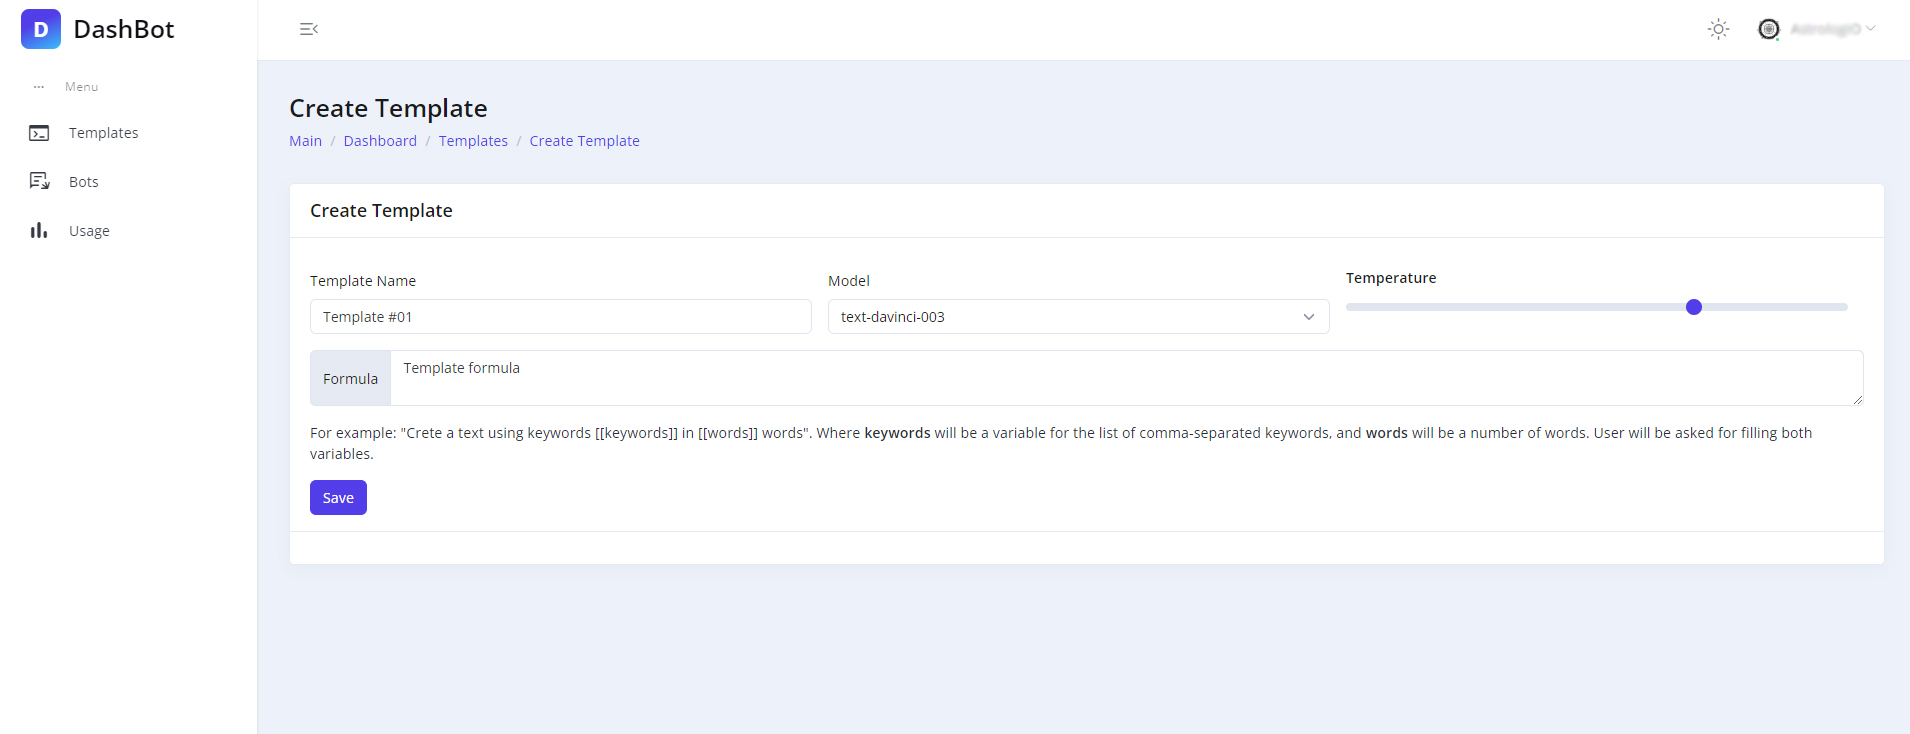
When you create a template, you set the formula, select the model from OpenAI, and set the temperature of the template - the degree of creativity of the AI when generating the result.
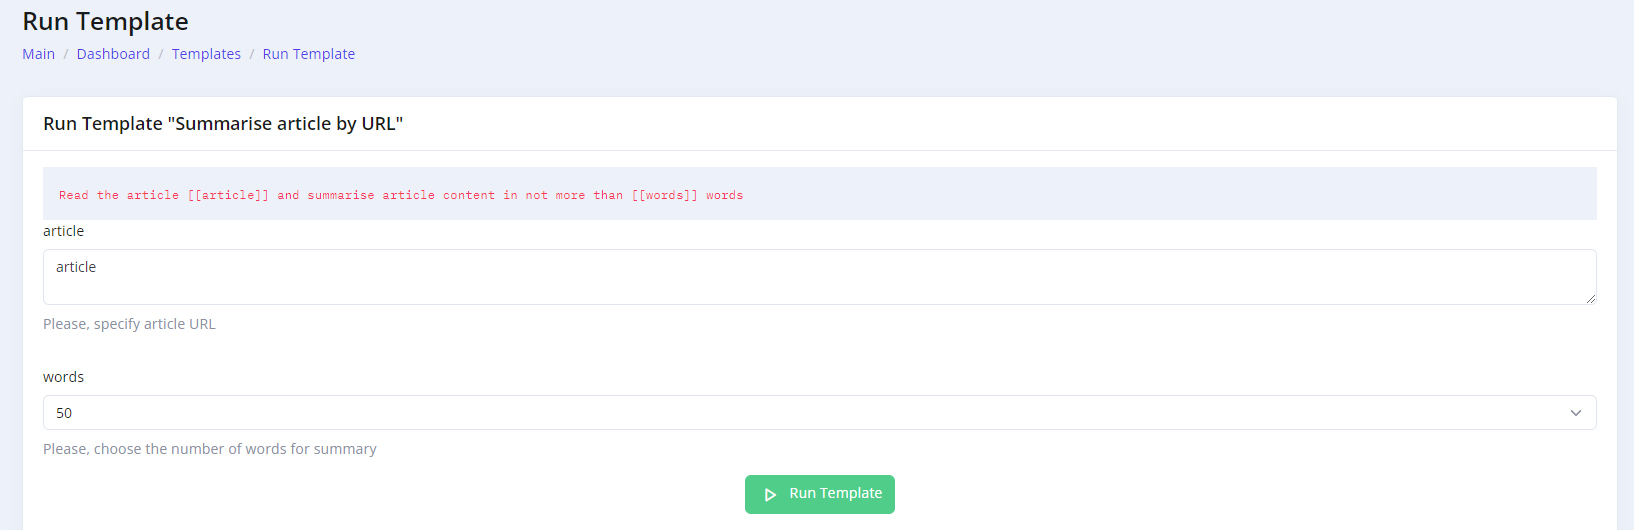
For example, create a template: Read the article [[article]] and summarize article content in no more than [[words]] words. Let's write such a phrase in the formula.

Save the template. The system has automatically extracted variables from the formula, and now you can configure what the bot will ask the user when it asks for each variable.

There are different formats of variables: text, number, etc.
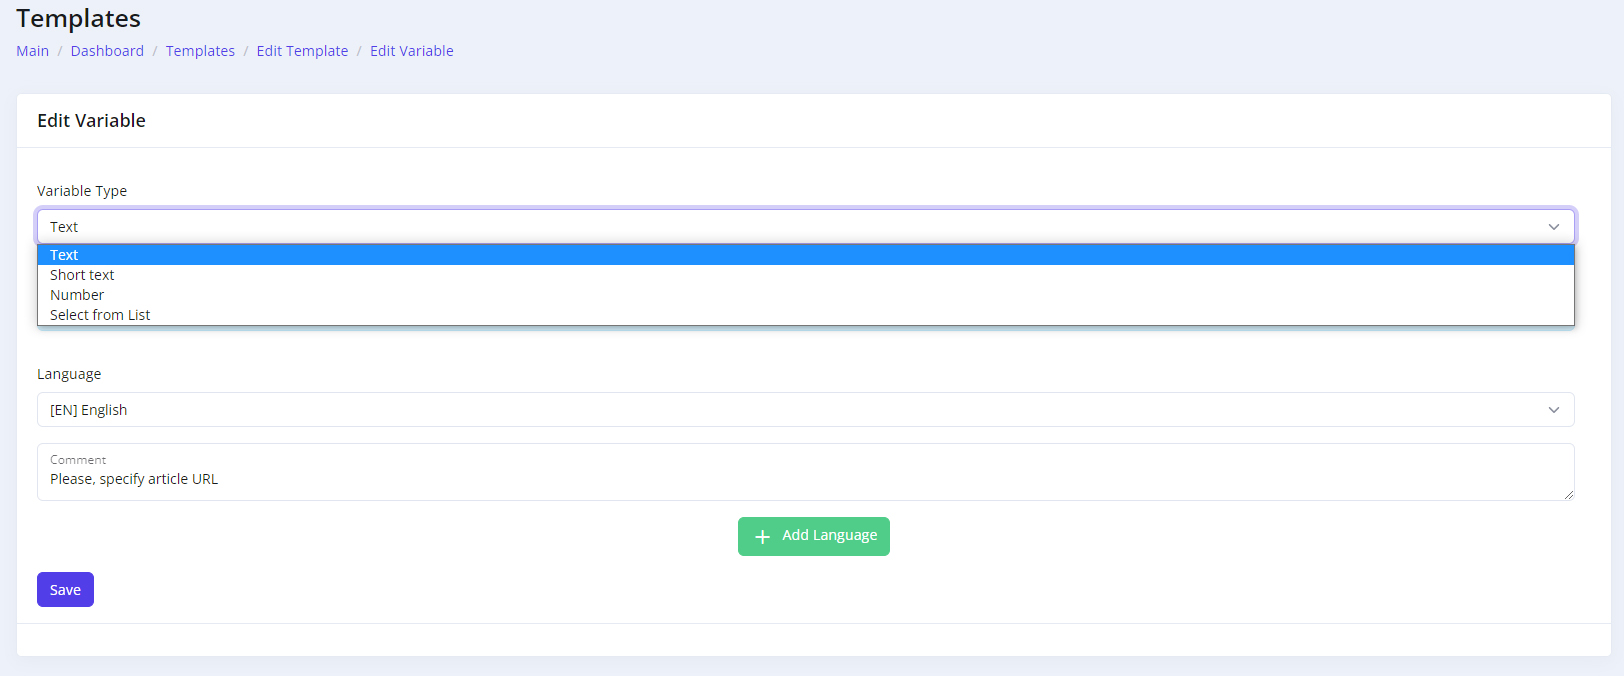
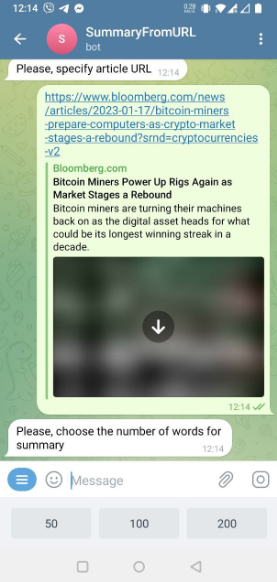
For example, for a given variable, let's specify a comment: Please, specify article URL. You can specify the variable description in different languages. The bot communicates with the user in the language which is set in the user's Telegram interface.
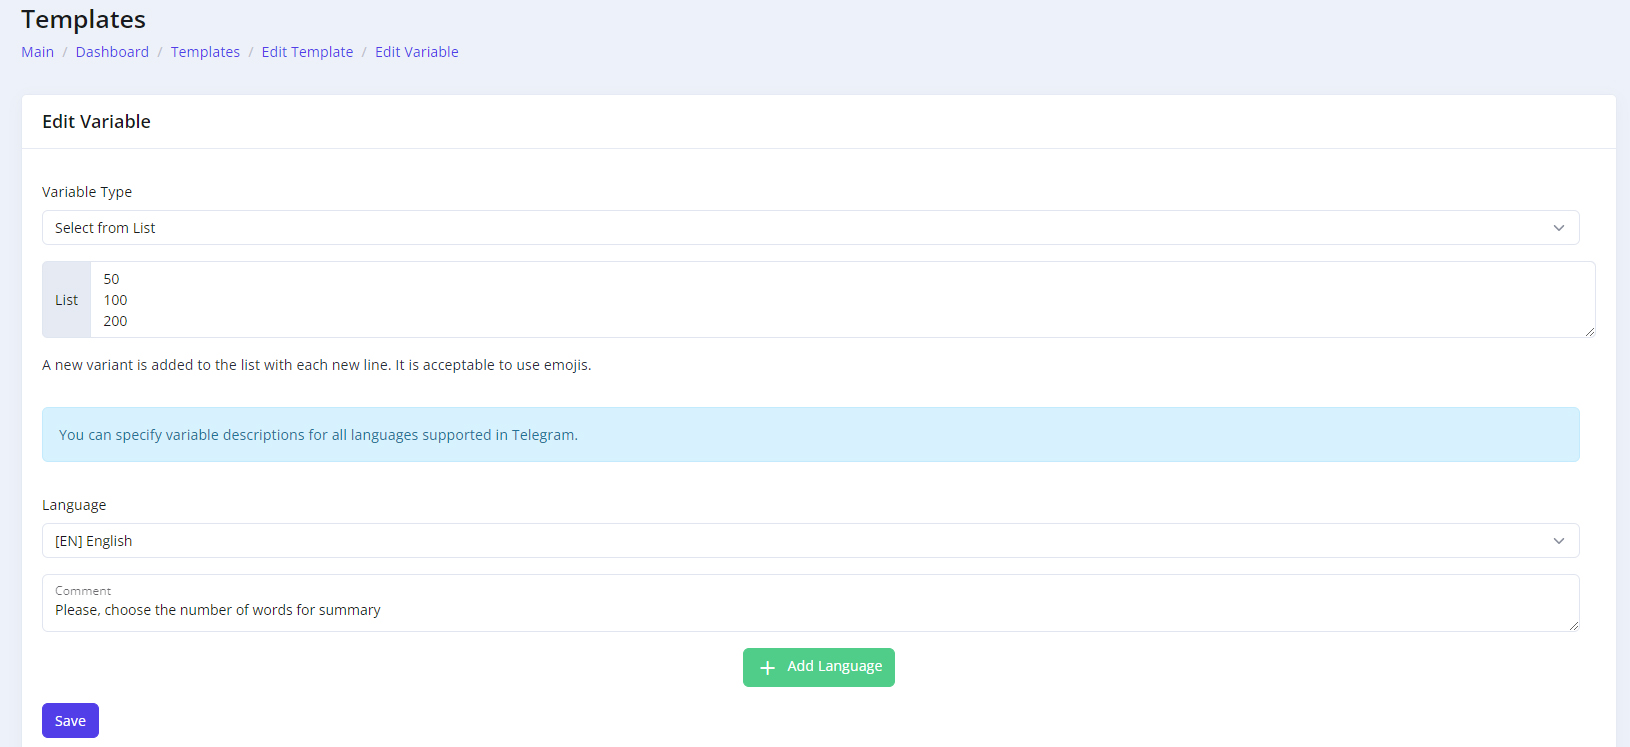
For the variable words, set the preset options of 50, 100, and 200 words.
After setting up the variables, the template is ready for testing. It can be tested directly from the admin interface. To do this, go to the menu "Run Template" in the list of templates.
Let's fill out the form to check how our template works.
For example, let's take this article https://www.coindesk.com/markets/2023/01/18/as-us-debt-ceiling-nears-crypto-observers-maintain-risk-on-bias/ as the URL parameter, and choose a 100-word sammari. We get the following result when we click on "Run Template".
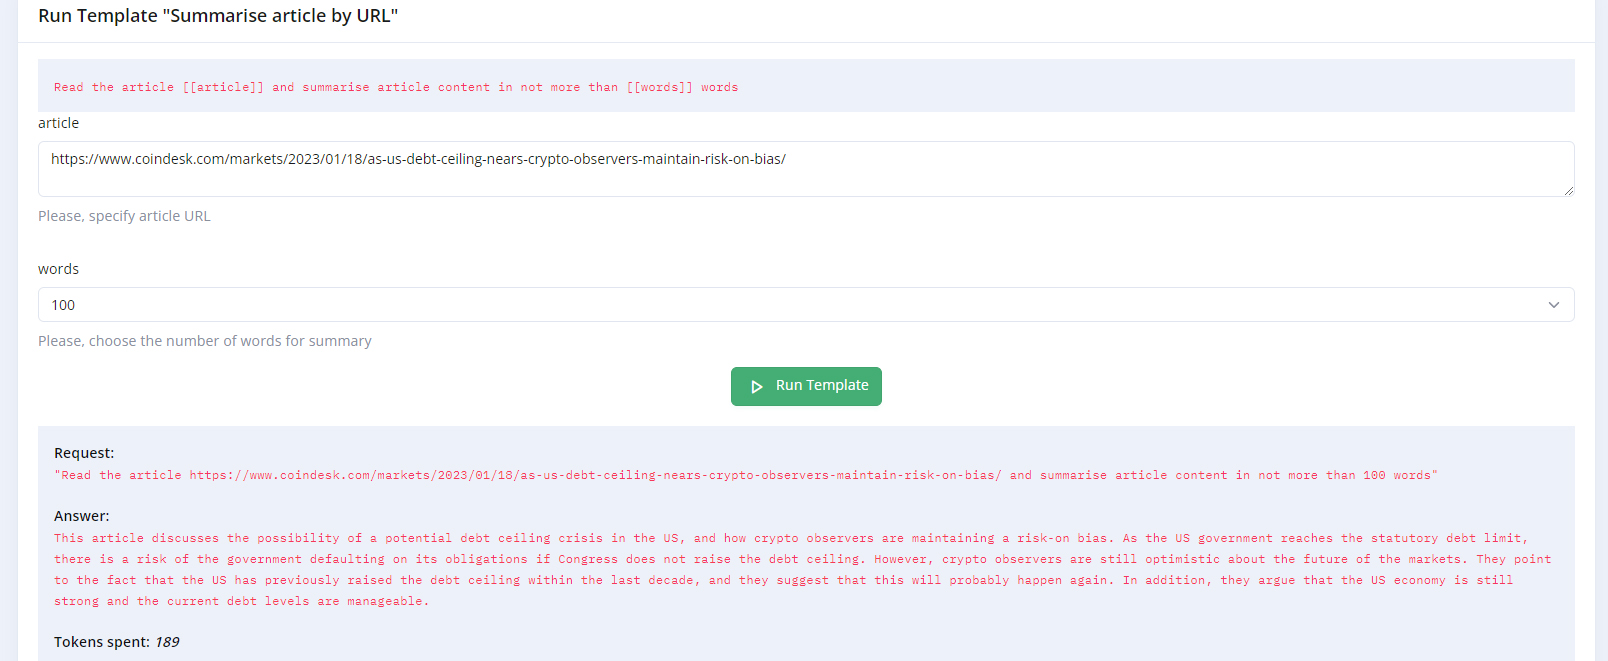
We can see that the formula worked perfectly, the text was generated, and we got 189 tokens taken from our account for this request.
Conclusion: the formula is ready to be used in the bot. Now let's create a bot, one of the functions of which will be to generate abbreviated article content by link.
Step 3: Create and configure the bot.
We create a bot. It is very simple and we have described the process below. However, if you have any difficulties, you can always additionally use the official Telegram documentation: https://core.telegram.org/bots/tutorial#introduction
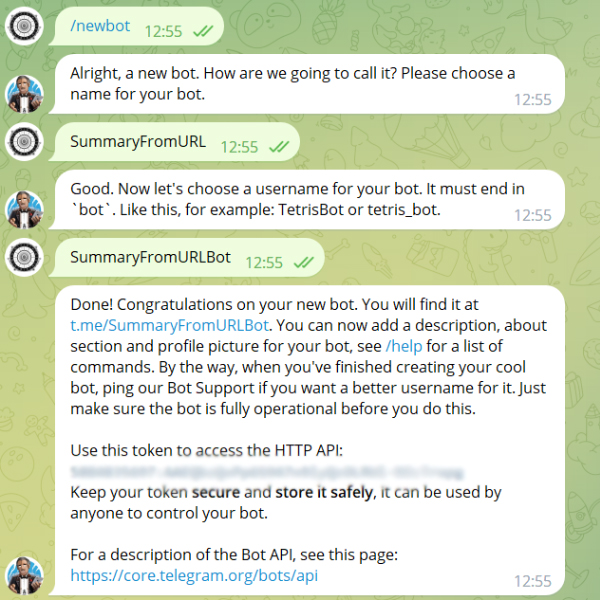
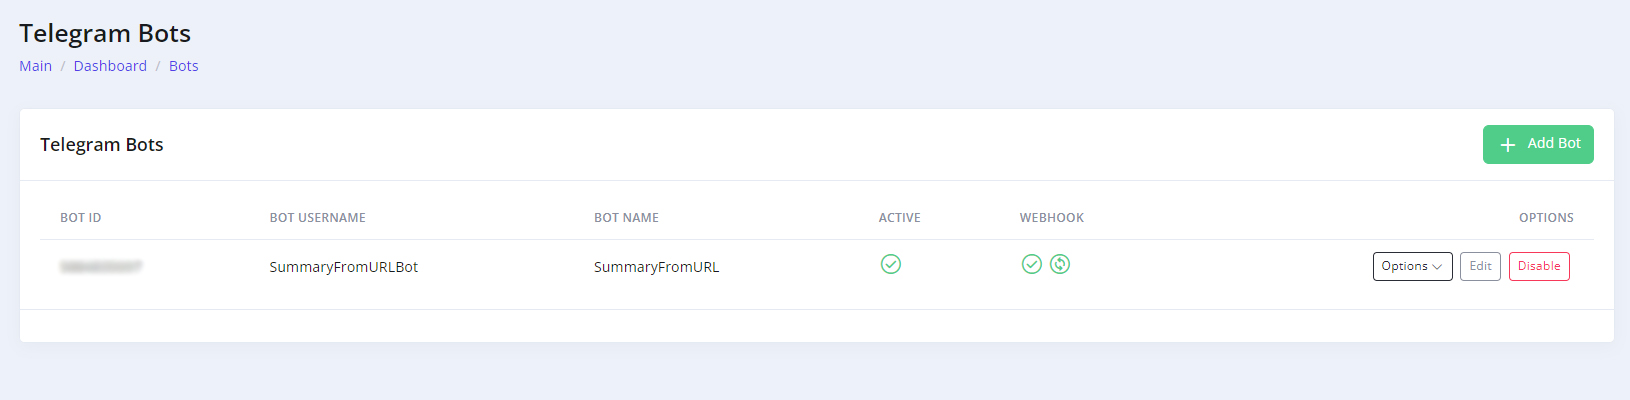
So, we got our bot token. We named it SummaryFromURLBot: http://t.me/SummaryFromURLBot
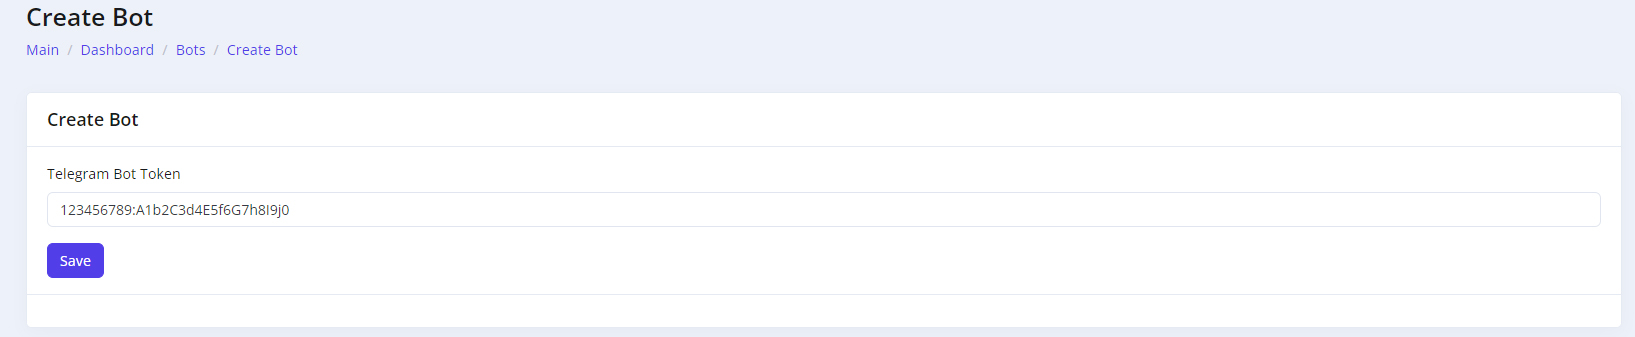
Now let's add a bot to our constructor. To do this, go to the bot management menu, create a new bot, and specify the bot's API key.
The bot was successfully added, and we see that it was automatically configured Webhook, as well as the system pulled its name and name.
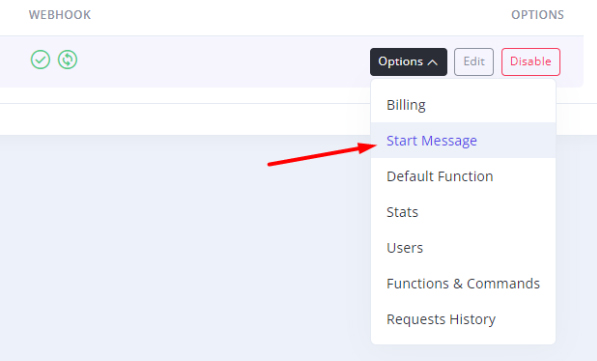
Now let's configure the bot
First of all, let's form a brief greeting for the bot. This is the message the bot will send to users after starting the /start command.
The start message can also be recorded in different languages and will display the message in the language selected in the user's Telegram settings.
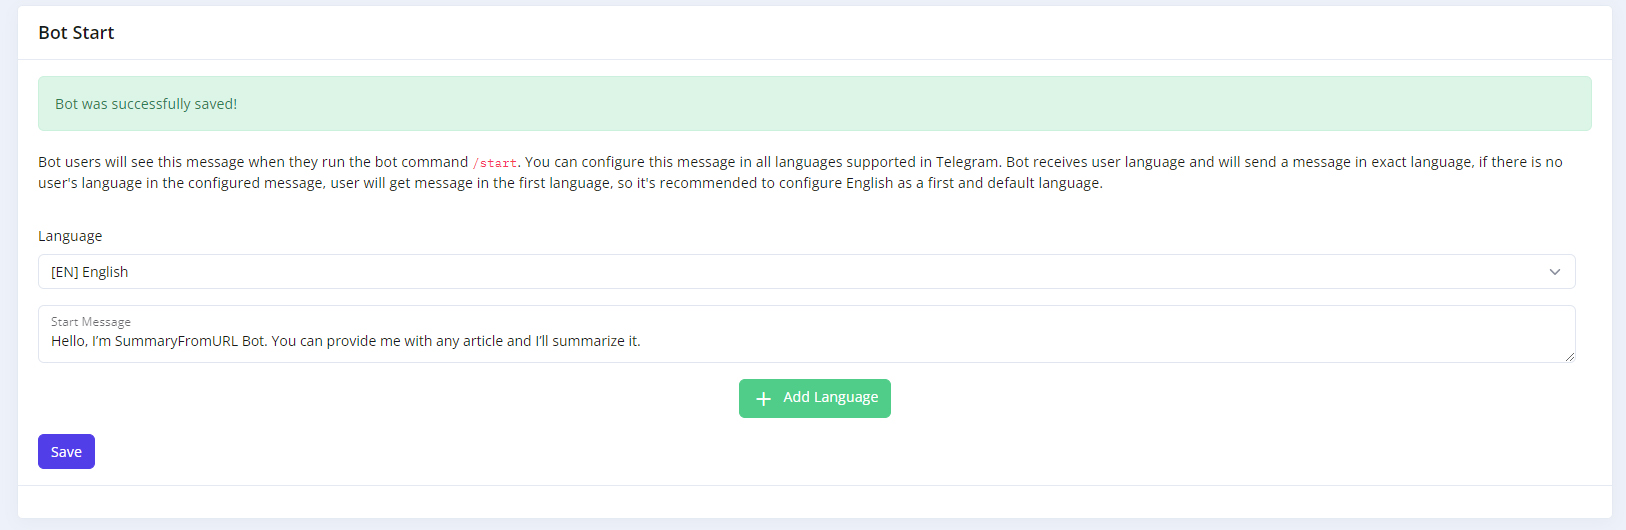
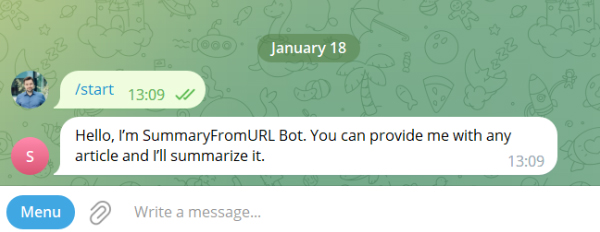
Let's enter this as a message: Hello, I'm SummaryFromURL Bot. You can provide me with any article and I'll summarize it.
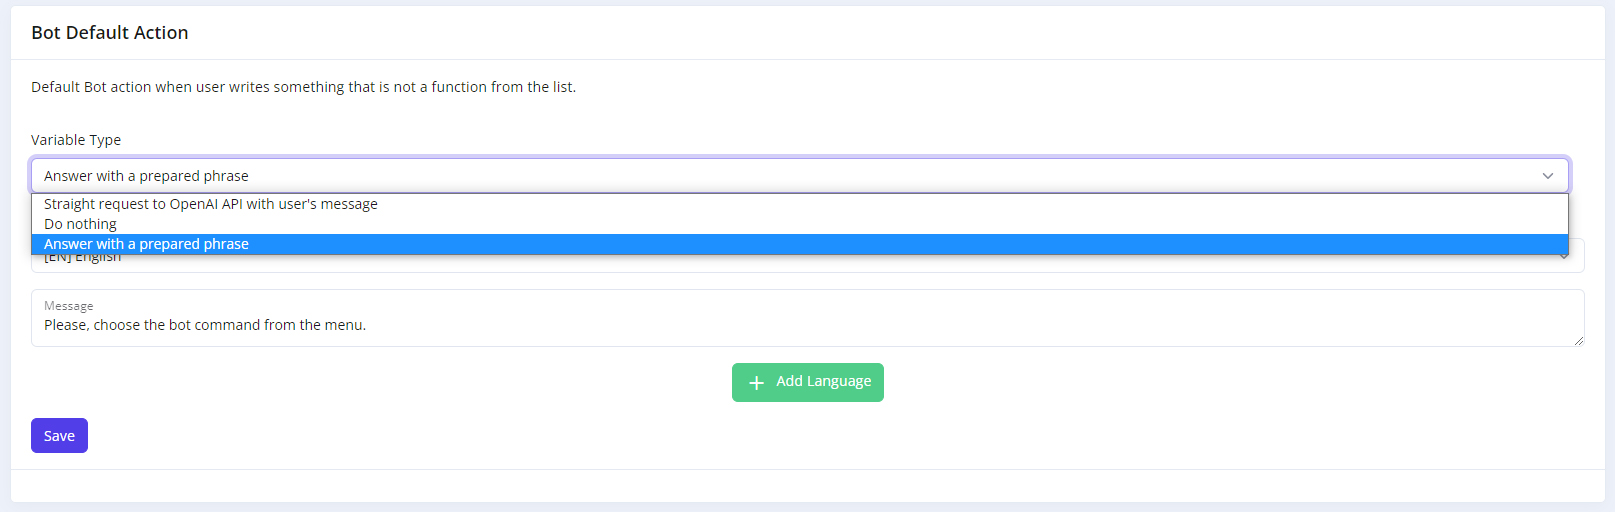
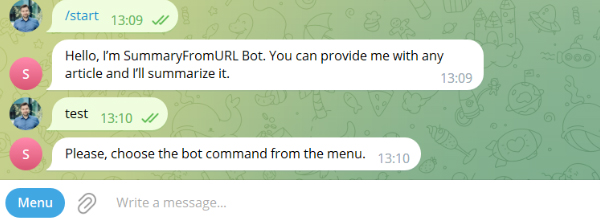
The next step is to configure the default action for the bot. There are 3 options here: do nothing, generate a request for the specified message directly to OpenAI, and output a message such as "Please select a command from the menu". The phrase can also be customized in different languages.
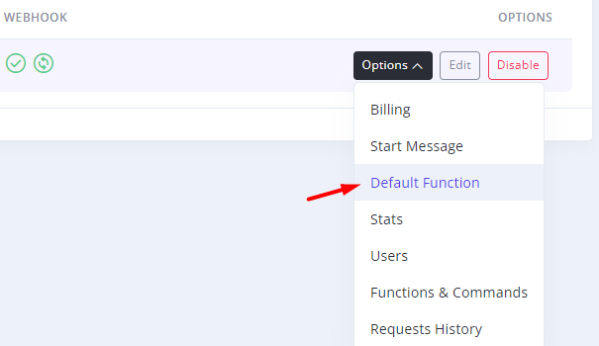
Let's specify that the bot will ask to select a command by default.
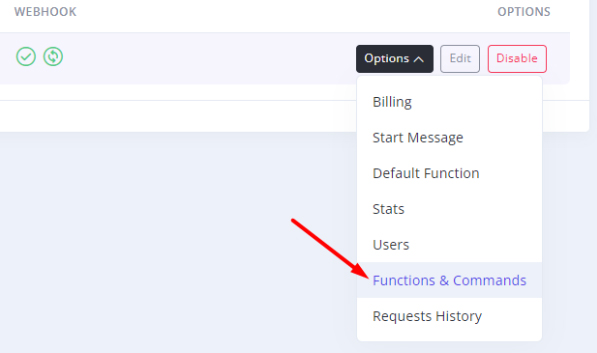
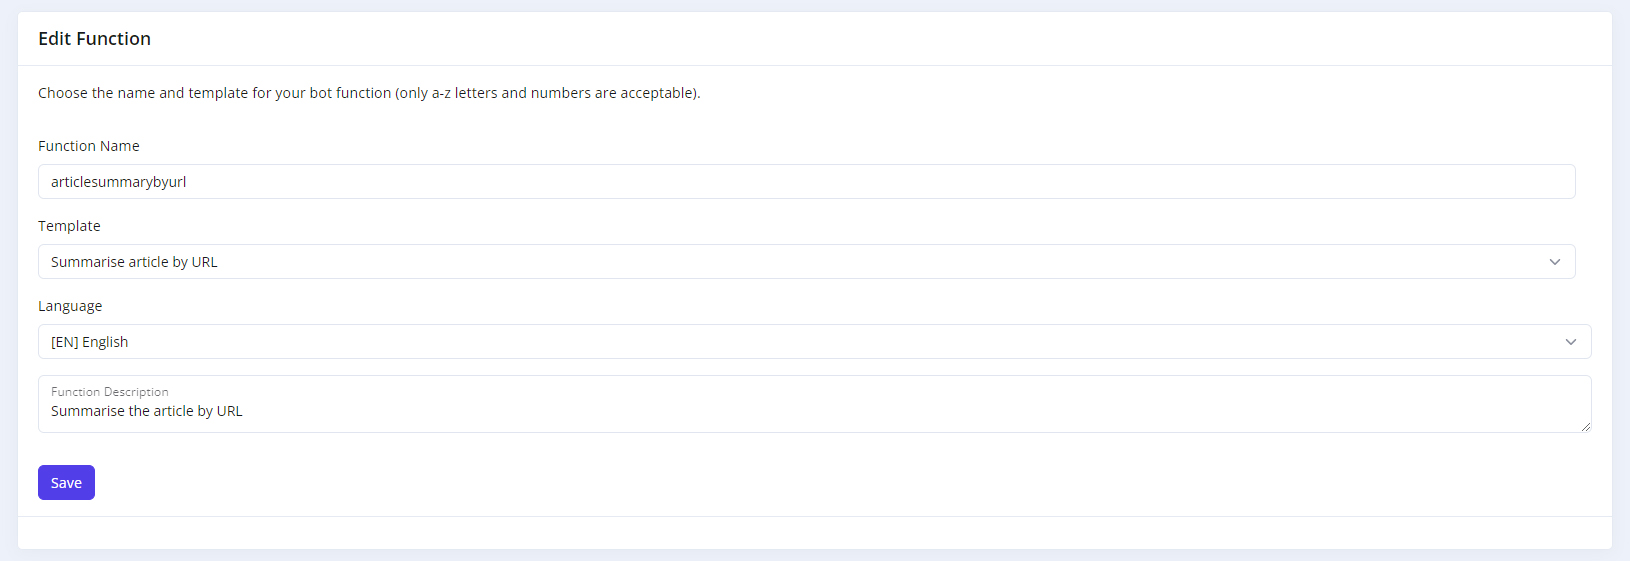
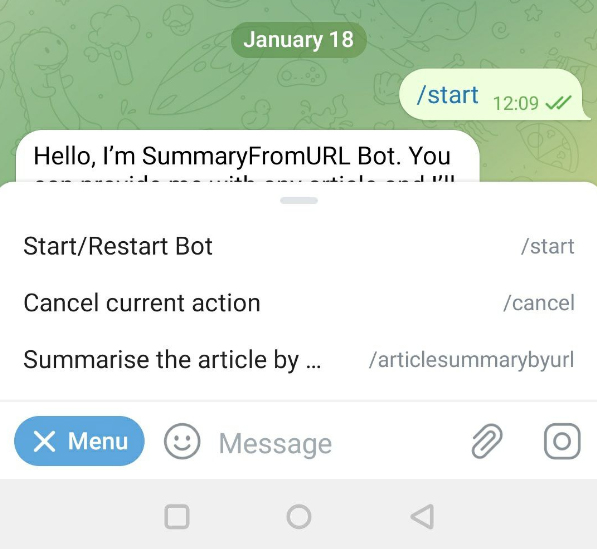
Now let's move on to the final step: setting up commands for the bot.
By default, the bot is assigned 2 commands, they cannot be edited. They are to start/restart the bot and cancel the current operation.
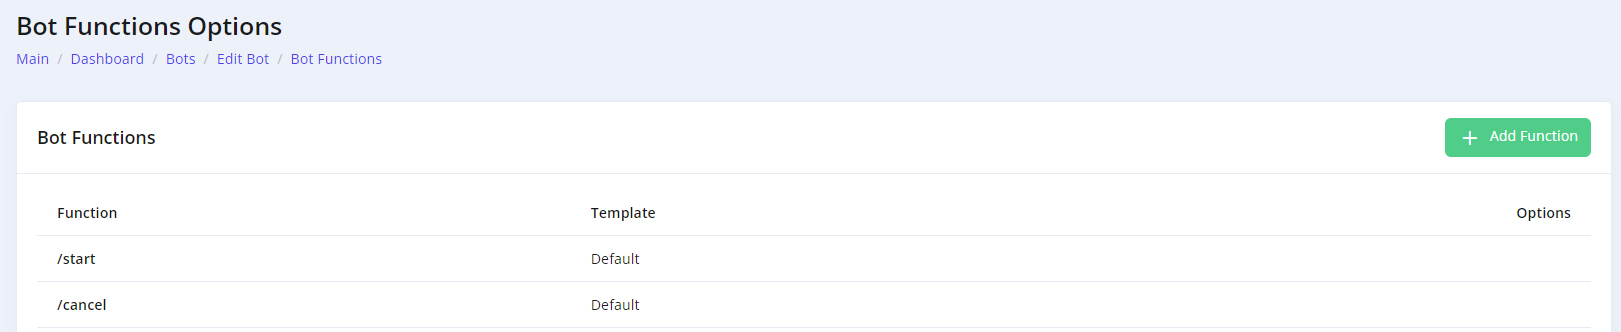
Let's create another command, let's call it articlesummarybyurl. Select the template we created in the settings, as well as specify a description of the functions for the bot interface. Description of functions in the bot menu supports only 1 language, so let's choose English.
The settings are done, let's move on to the test of the bot itself. Follow the link http://t.me/SummaryFromURLBot to launch our bot.
The bot greets us with a preset message specified in the settings.
Let's try just writing something to the bot, and the bot responds with a preset message.
Now let's try our AI function. Open the bot menu and select it.
Run our command, and it takes turns querying our template variables with the specified comments.
Where we specified a choice of options, the script generated buttons to choose from.
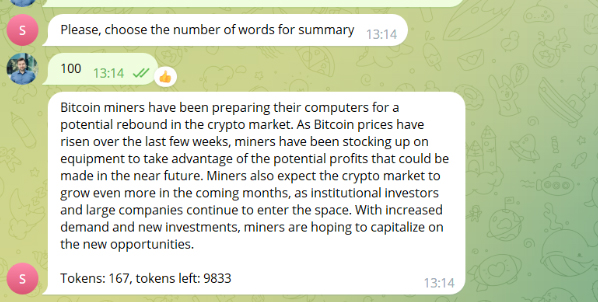
As a result, the user gets a sammari for the given article and sees how many tokens it took to create that query.
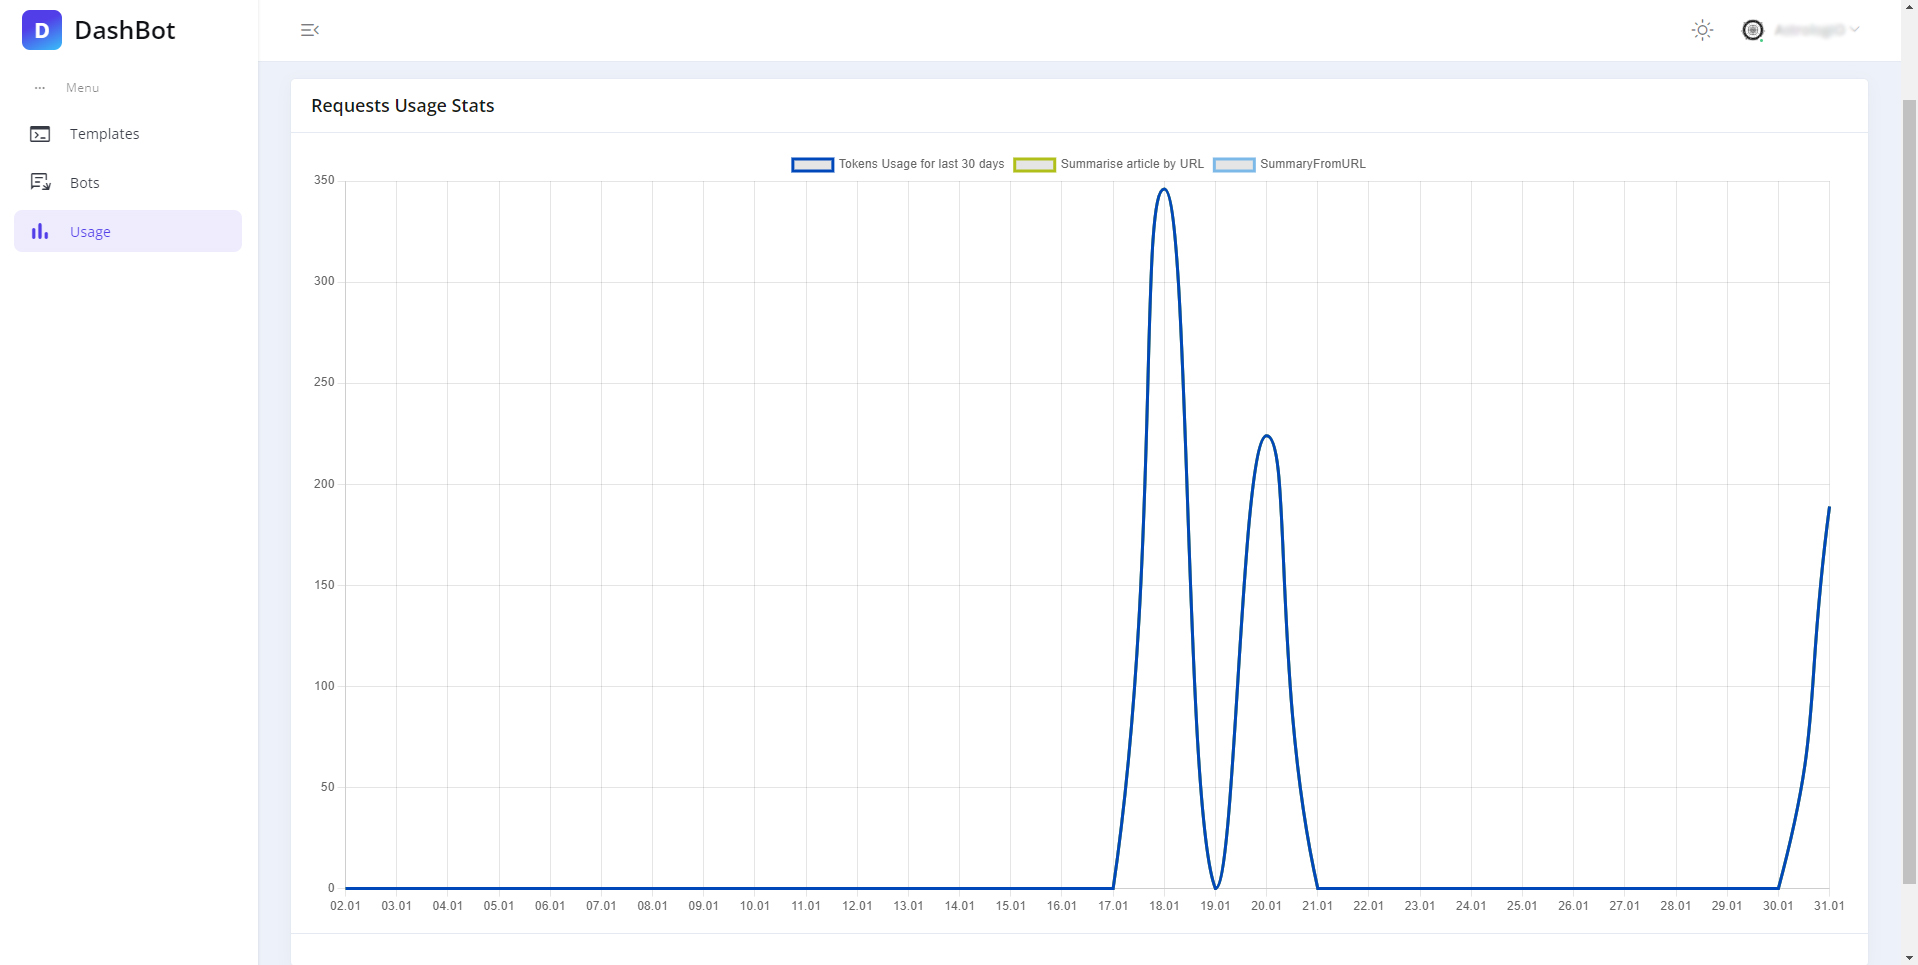
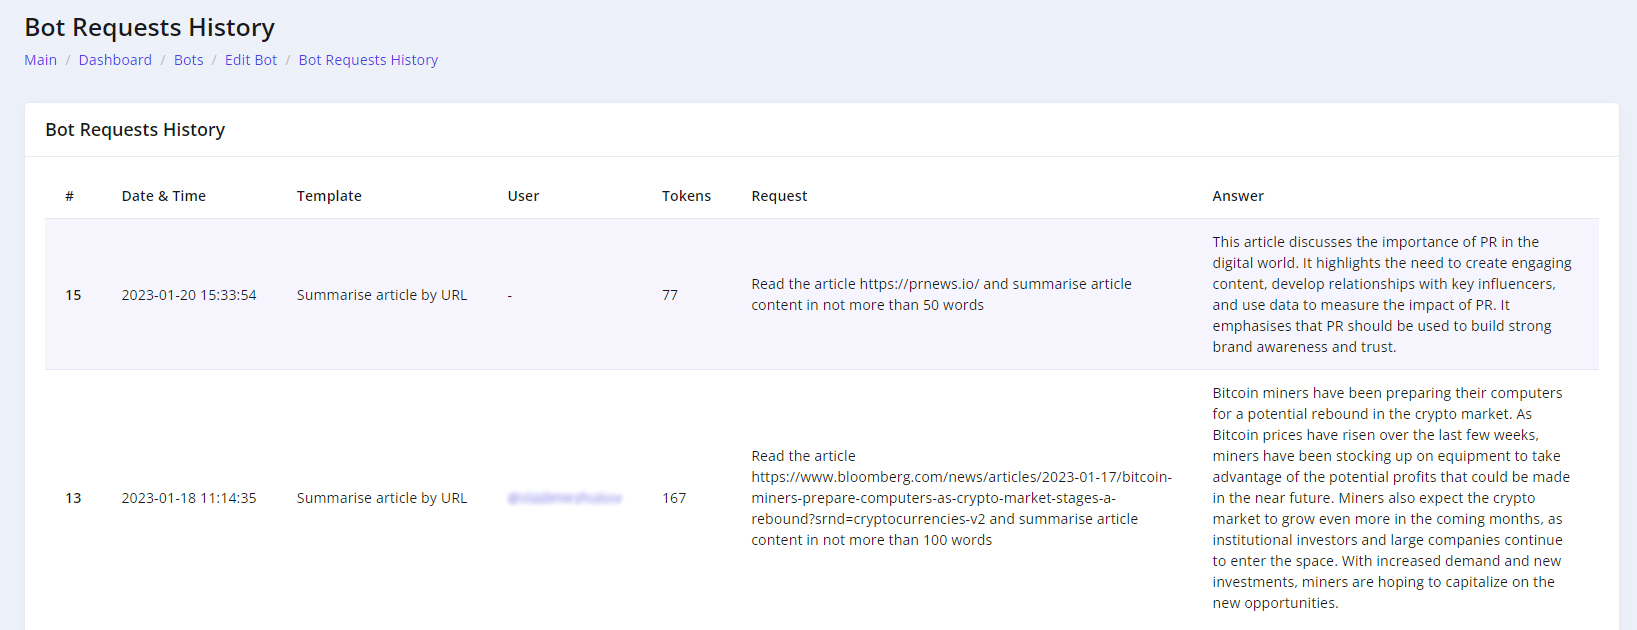
Tokens were debited from both the account of the creator of the bot and the user within the bot. The entire token economy can be tracked in the Stats section.
We can also see in each user's bot settings, statistics on the use of features and tokens, as well as accrue tokens to different users.
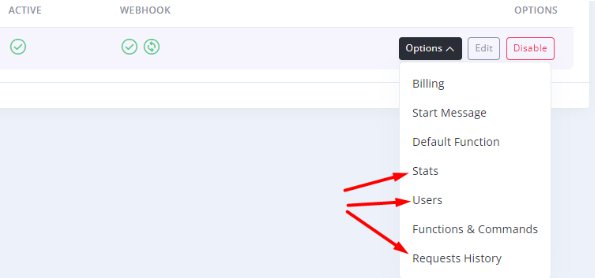
In the request history, we can see which template was requested and which user made the request. Accordingly, we can improve and edit the templates as we see how they are triggered by users.
In the users section, we can see who installed our bot and how many tokens are currently on the account of this user.
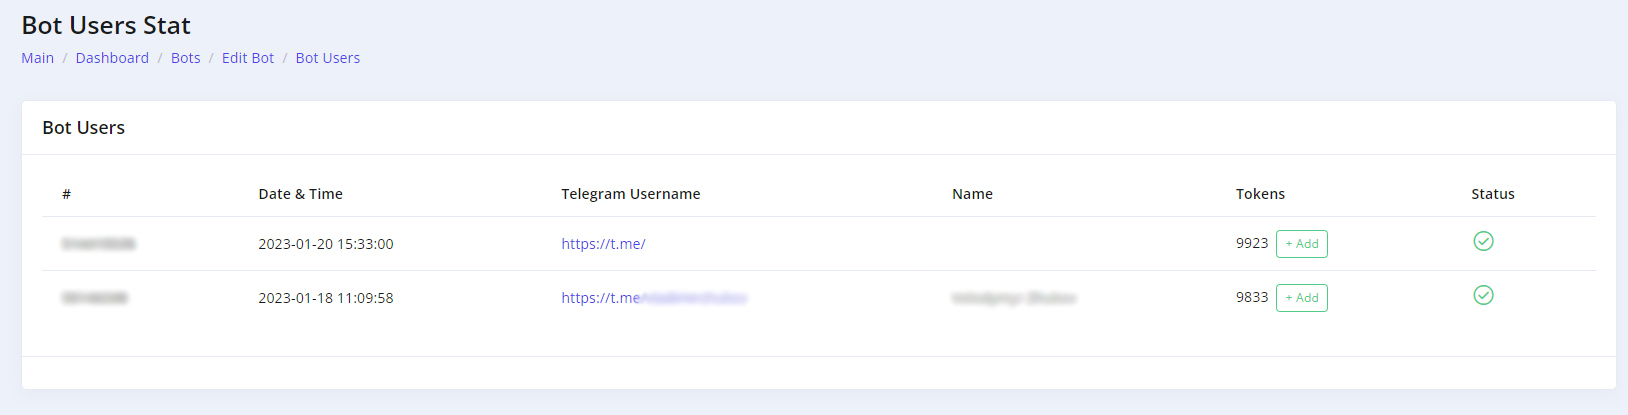
We can also add tokens to the user's account by clicking Add.